
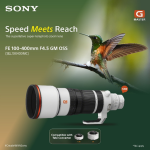
Sony India today announced the launch of the FE 100-400mm F4.5 GM OSS, the latest addition to its flagship G Master™ series of full-frame Alpha™ E-mount cameras. Designed for wildlife, birding, sports and photojournalism creators, the new lens combines outstanding optical performance, high-speed autofocus, and enhanced portability to help professionals capture every moment with … [Read more...]
Canon Unveils EOS R6V and RF 20-50 F4L IS USM Lens
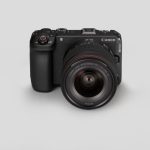
Canon India, today announced the launch of its latest professional camera kit featuring the EOS R6V full-frame camera and the RF 20-50 F4L IS USM Lens - Canon’s first-ever full-frame professional-grade L-series lens with a built-in power zoom. Designed to meet the evolving needs of filmmakers, creators, and modern production professionals, the power- duo combines cinematic … [Read more...]
Synology Introduces AI-Ready Storage Infrastructure Push for Indian Market
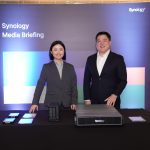
Synology Inc. today announced an expanded India strategy for 2026 centred on AI-ready data storage and management infrastructure for enterprise customers. The company also said that its enterprise sales in India have grown rapidly over the past five years, with the biggest contribution coming from the government and public sector organisations. As part of its India strategy, … [Read more...]
Sony India Introduces a Next-Generation Camera Tracking System, OCELLUS

Sony India announced the launch of OCELLUS (ASR-CT1), its first advanced camera tracking system designed to simplify and enhance augmented reality (AR) and virtual production workflows. Built for creators across broadcast, cinema, and live production environments, it delivers marker-free camera tracking through multiple sensors making it a perfect choice for Virtual … [Read more...]
Samyang AF 24mm–60mm F 2.8 FE
Words: Hoshang Billimoria The second lens launched with the joint efforts of Samyang and Schneider Kreuznach is the 24mm to 60mm F 2.8 standard zoom for the Sony E mount. Coupled with the 14 – 24mm F 2.8, the buyer gets a focal range extending from 14mm to 60mm by buying two light, compact lenses. Design & Build Quality This Samyang lens is meant for full frame … [Read more...]
